Super simple! Place a package of Nutter Butters in the freezer. I wait until the next day. Dip them in melted white chocolate and decorate with chocolate chips (normal size for mouth and mini for the eyes). That is all there is to it.
I started decorating cakes in 2009 and have posted my creations on facebook. Many have expressed the desire to share the photos with others. While my intent is to share my cakes, this will most likely become a place for me to share many of my favorite things.
Sunday, October 30, 2011
Saturday, October 29, 2011
Pumpkin Marshmallow
This is a fudge dipped marshmallow. However, you could use orange candy melts as well. I took a large marshmallow (the giant kind) and placed a caramel apple stick in it. I then dipped the marshmallow in vanilla fudge (colored orange). I used semi-sweet chocolate chips (they have a better triangular shape than the others) for the eyes and nose and mini chocolate chips for the mouth. I put them into place as the fudge began to cool a bit so that they wouldn't slide. I wrapped them in individual bags and used some green string to seal the bag. Super sweet treat!
Friday, October 28, 2011
Mummy Cupcake
Just like the owl cupcake, it is pretty amazing the amount of mummy cupcakes you can see when you google it. For this gem, I used a knife to cover the cupcake with frosting. I placed two chocolate chips for eyes. Then, using a basket weave tip - smooth side up, I used random patterns to cover the cupcake. I also made one swipe around the side to clean up the edges a bit (not too much, you still want a rustic look). There you have it - fun and easy. It is amazing to see how two chocolate chips and some frosting can take on personality.
Thursday, October 27, 2011
Owl Cupcakes
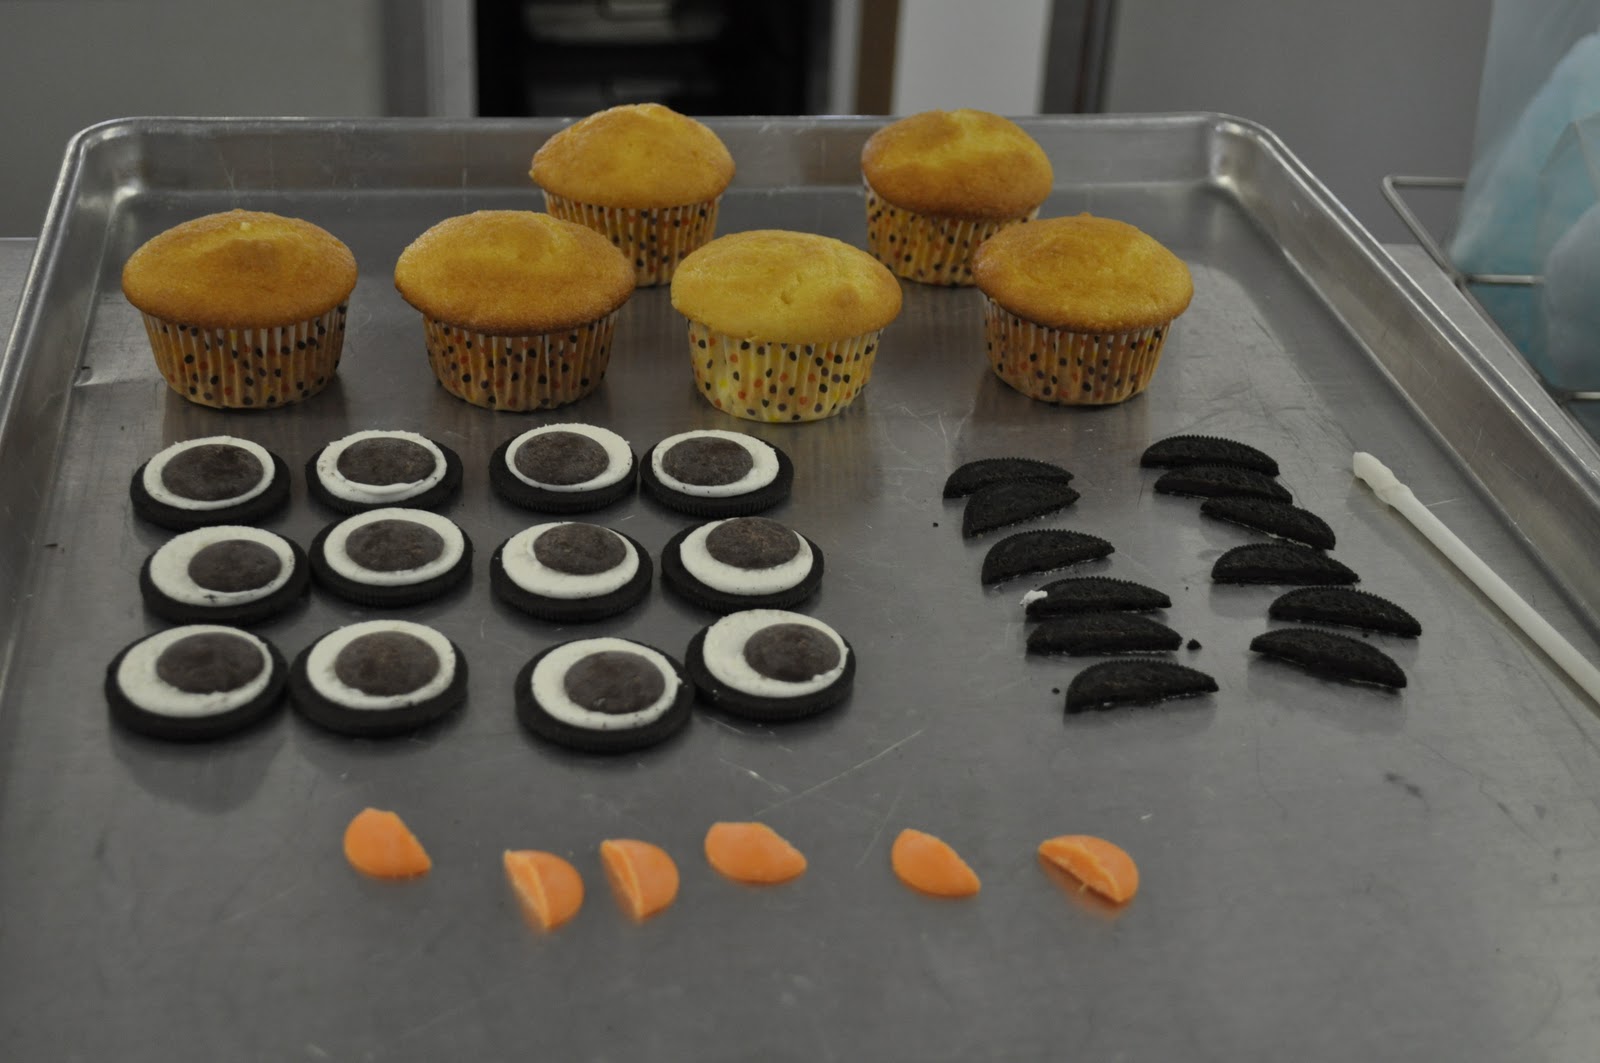
I have seen these owl cupcakes all over the web, and you can make them even cuter with a little extra piping - but the goal this month was to make something cute fast. Here is how I did it.
Split the Oreos in half - this is an art and takes some practice. I have seen online that some people stick them in a microwave for a few seconds, but I didn't find that helpful.
Cut the 'non-frosted' side into thirds. I found it best to cut right along the "Oreo" logo in the center.
Discard (or eat) any broken or extra cookie pieces. I used candy melts for the center of the eye, but I saw people using M&M's and Junior Mints as well. Whatever you have around will probably work. I used a bit of melted white chocolate as glue. Again, that is what I had handy.
I used more candy melts (orange) for the beak. I simply cut them in half. Again, you could use many things. I even saw someone used some banana Runts.
I used a very light chocolate frosting. I used my standard 1M tip. Another fun way to do this would be to lay down a layer of frosting as your glue, layer the parts, then come back with something like the grass tip to add texture around the eyes and nose.
Frost the cupcake. I started in the center and worked my way around.
Place eyes. Pupil placement is important - it determines the facial expression on your little owl.
Add the 1/3 Oreo as the tufts on top of the owls head.
Finally the nose. And you have a really cure little owl cupcake.
Wednesday, October 26, 2011
Sunflower Cupcake
My parents own a pumpkin patch. I have spent the last 4 weeks working every day for them. Needless to say, I haven't had much time to blog. However, I did log some time in making some sweet yummies! I had to come up with some ideas that were cute, but not time consuming to make. So this was the first idea. Simply take a cupcake and put a little frosting on top and an Oreo cookie on top of that. Use a leaf tip to add a few layers of petals with some yellow buttercream frosting and you have yourself a cute little sunflower. More simple fall ideas to come.
Monday, September 19, 2011
Fall Wedding Cakes
What is better than a wedding cake? Two wedding cakes!
A few months ago, my husbands Aunt asked if I'd make her a wedding cake, she wanted a chocolate cake with chocolate ganache frosting and fall leaves and flowers down the side of the cake. I came up with an idea and sent it to her. She responded with, "can you make two cakes?" One of them as we had already discussed and one similar only carrot cake with cream cheese frosting. My plan was to get started on the gumpaste flowers weeks in advance, but time got away from me. The week before the event, the scramble began. So, my intent was to take pictures of all of the flowers in stages...
But that is as far as I got. :) As I get working on a time crunch I forget to stop to click the camera. Oh well. This is the beginning of the roses that I made. I placed them all on wires (new for me), not sure it helped me tremendously in arranging them, but it was nice to try something new.
I made a double batch of chocolate ganache and cream cheese frosting. I've never made chocolate ganache before. It was surprisingly easy and I loved how smoothly it went on the cake. I'll definitely use it again.
I spent an entire day baking 6 cakes (2 8" and 4 12" to be stacked).
I frosted them separately and then stacked them. There is filling inside the cakes as well.
We drove an hour and a half to the site of the reception with the cakes frosted and stack. The flowers were all ready to go as well. I wanted to put it all together there so that I didn't have to worry about anything shifting on the long car ride. In the picture above, I'm adding the shell border around the base of each cake.
Above is a lot of the flowers and leaves that again were made ahead of time. I tried modeling chocolate for the first time - hoping to make the leaves out of it. It was very easy to make, but it was far to soft when we tried making the leaves. At 10:00 the night before we decided not to mess with it and to use the gumpaste instead. I have a lot of the modeling chocolate left over, so I think I might mess around with it a bit now to see what I can do with it without a time line.
Below, are the finished products. I was very pleased with the finished product. Which I don't say too often. I spent over 40 hours on these two cakes. Incredible amount of time, but I learned a lot and enjoyed my time (for the most part).
Sunday, September 18, 2011
65
Just when I think I've got it all figured out, God humbles me. For a gentleman's 65th birthday I was asked to make some cookies (to hang from a tree) and mini cupcakes. I found the cutest cookies to inspire me and I decided to create the cupcakes to match. I was given the colors orange and teal to match the birthday color theme. I started by creating royal icing 65's, larger ones for the cookies and smaller ones for the cupcakes. I made far more than I would need as I knew there would be some breakage.
They did not dry! I'm not sure what happened. I've never had difficulty with royal icing. So, with less time to allow them to dry I had to come up with a different idea. Idea number two, the newly developed plan B was chocolate. Through a crazy combination of orange, red, and brown we created the right color of orange and my husband was tasked to created the 65's for the cupcakes while I worked on the ones for the cupcakes. We were crunched a bit for time (wasn't expecting to be making all of the numbers again).
Cupcakes were frosted, and sprinkled and each received a chocolate 65.
I love baking/decorating sugar cookies! I used a really thin royal icing to flood each cookie and placed a chocolate 65 on each while the icing was still wet. After the icing dried and added the white. I used a sheer white ribbon to thread through each of the holes so that they could be hung at the site of the party.
While this project took longer than I expected, they turned out really well. Super cute and really delicious (don't worry, there were extras that I was able to sample).
They did not dry! I'm not sure what happened. I've never had difficulty with royal icing. So, with less time to allow them to dry I had to come up with a different idea. Idea number two, the newly developed plan B was chocolate. Through a crazy combination of orange, red, and brown we created the right color of orange and my husband was tasked to created the 65's for the cupcakes while I worked on the ones for the cupcakes. We were crunched a bit for time (wasn't expecting to be making all of the numbers again).
Cupcakes were frosted, and sprinkled and each received a chocolate 65.
I love baking/decorating sugar cookies! I used a really thin royal icing to flood each cookie and placed a chocolate 65 on each while the icing was still wet. After the icing dried and added the white. I used a sheer white ribbon to thread through each of the holes so that they could be hung at the site of the party.
While this project took longer than I expected, they turned out really well. Super cute and really delicious (don't worry, there were extras that I was able to sample).
Subscribe to:
Posts (Atom)