Many, many months ago...I agreed to do a lego themed cake and cupcakes for a friend's wedding. This cake was a bit more of a challenge as their was a lot to do (a 3 tier cake and 72 cupcakes) and I had an additional child to take care of. Turns out, a break from cakes may be in the best interest of my family and my sanity :). I decided if I was going to pull this off, I needed a good plan of attack.
The Plan
The weekend prior to the cakes due date:
-Make the chocolate lego bricks
-Make the lego knobs
-Mix fondant colors for covering cakes
-Make the cakes and freeze them (I will talk more about this later)
Tuesday:
-Make frosting
Wednesday:
-Bake cupcakes
-Frost Cakes
Thursday:
-Cover cakes with fondant
-Ad detail work to cakes
Friday:
-Frost cupcakes
-Deliver
When my friend came to me, she brought a stack of lego bricks in the shape of a three tier wedding cake, she wanted the cake to look like that...only bigger. Her colors were pink and brown, so the cake was to coordinate. As always, I started by taking many pictures of the process, but as I got involved...I picked up the camera less and less. Stay tuned to see how well I stuck to the plan and how it all turned out.
Wednesday, September 12, 2012

Tuesday, September 11, 2012
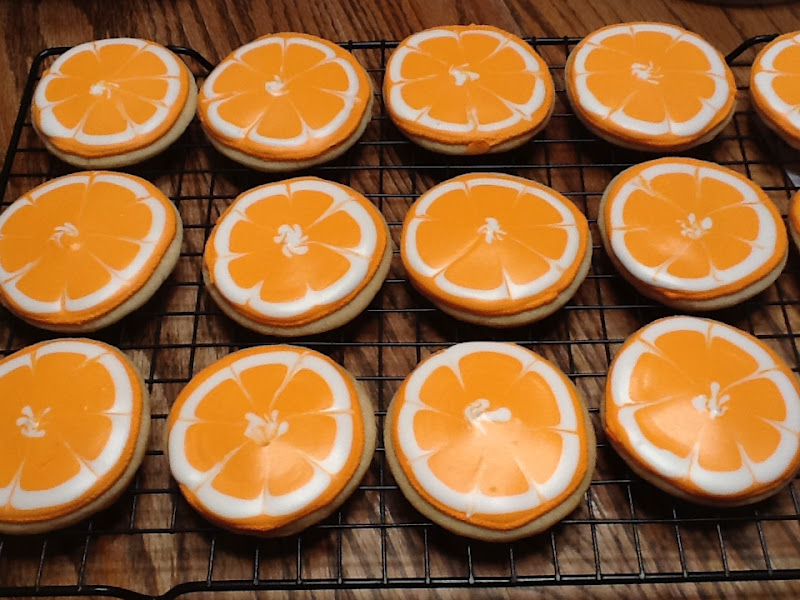
A taste of summer
Another adoption fundraising bake/garage sale. Our good friends Aaron and Kristy have decided to begin the process of adoption to add to their already beautiful family of three. Last minute, I decided to do some cookies...I actually started these at about 5:00 in the evening and finished them around 12:00 am. I wouldn't recommend it :). I saw a tutorial for these cookies a few months ago, and this seemed like the perfect opportunity to give them a try. You don't really need a step by step, as the tutorial is done very thoroughly, but here are some pictures for you.




Sunday, August 12, 2012
Owl Cookies
It has been a while since I've posted anything. The main reason is the new love in my life!
 |
| Click on the picture to read more about our adoption story. |
We welcomed Titus to our family over two months ago. Isn't he just the cutest thing you've ever seen? He's grown a lot in the last few months. It has been a blur of pure joy.

You may recall in my last post we were hosting a garage sale for some close friends of ours who were raising funds to adopt. Not long after we brought Titus home, they too were blessed with an addition to their family. I had to take a break from my maternity leave to provide some cookies for her baby shower for two reasons: 1) I am so excited for them. 2) I love owls, and her nursery is owl themed. The below decal is on the wall in their little one's
nursery.

With my inspiration, I was off. I used a 3 1/2 inch round cookie cutter. Decorated with royal icing, I tried to implement different parts of the decal. My favorite were the little owls. This picture was taken before I got the cute little flowers on the owls heads. They were even cuter after.


 |
| Congratulations to Talley and Sarah and their precious little daughter! |

Thursday, May 24, 2012
More Cookies
 |
| Click on image to make larger. |

Sunday, May 6, 2012
Rhino Cake

This is four layers of chocolate cake with chocolate ganache between each layer (my friend is a huge fan of chocolate). I used American vanilla buttercream for the logo and the exterior. Crumb coat is a must when covering a chocolate cake with white frosting. I was pleased with my final coat of buttercream...pretty smooth. I used a hot offset spatula to accomplish this (dip your spatula in really hot water, wipe it clean, and use it to smooth your cake, it melts the buttercream a little for a smooth surface). Follow behind with a viva paper towel to smooth out any bumps. Not too shabby! There was a bit of bleeding between the white and black as the transfer thawed. I used Wilton food coloring, and I've heard some other brands are better for eliminating this problem. Speaking of black frosting, I add cocoa powder to my vanilla frosting first (making it brown) before adding the black food coloring. It is a lot easier going from brown to black than white to black.

Monday, April 30, 2012
Lace Sugar Cookies

I started with the purple border and flooded with tan. I let them set overnight and spent over four hours piping the detail on 30 cookies. I LOVE decorating cookies and was very pleased with the final product.


Wednesday, April 25, 2012
Strawberry Cheesecake

Subscribe to:
Posts (Atom)